How to create user defined field (UDF) in Microix
Creation date: 1/15/2018 5:07 PM
Updated: 9/27/2022 10:30 AM
User defined fields (UDF) is customized data created specifically for organization use. To create UDF apply the following steps listed here in the screen shots.
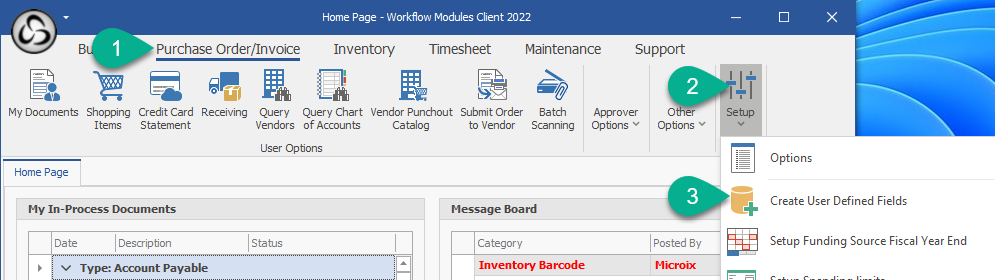
1. Follow steps to open the User Defined Field setup form
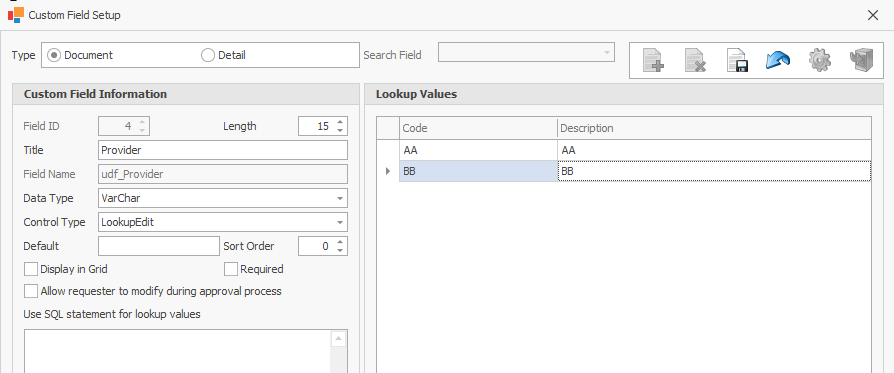
2. Before creating the custom field, determine if the field should reside in the document header or transaction detail. After determining the type of user defined field, select the TYPE (Document or Detail). Next, click the Add button to start the process of defining your new user defined field:
Finally, you map your user defined field to the Microix Document Type as shown below: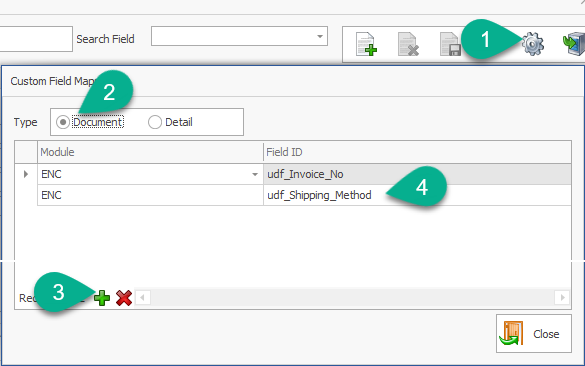
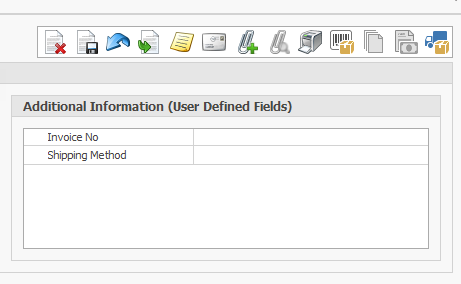

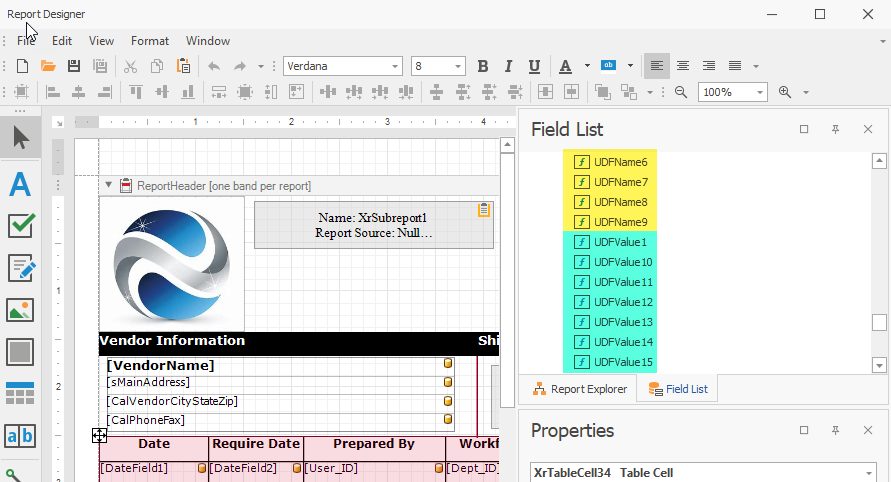
Additionally, if showing the value of the user defiled on the printed document is required, you can use the forms designer and add the field based on the Field ID assigned in Section 2.
1. Follow steps to open the User Defined Field setup form
2. Before creating the custom field, determine if the field should reside in the document header or transaction detail. After determining the type of user defined field, select the TYPE (Document or Detail). Next, click the Add button to start the process of defining your new user defined field:
Field ID - value is assigned automatically and will be a reference value for adding to the printed form if needed.
Length - enter the maximum length of the field (keep it to less than 30 if you are planning to show this in the My Document List, Approval List and Document Search)
Field Title - Name of the user defined field (do not use special characters) and keep to a maximum length of 15-25 when possible
Data Type - choose the data type you will accept into this field
Control Type - choose Text when the value is not known, Lookup if you want to provide a list of choices and DateTime to accept only Date values
Default - Recommended to leave this field blank
Sort Order - accept default 0
Display in Grid - check this option if you want the document type UDF to display in the My Documents, Approval List and Document Search data grid
Required - check is option if the requester has to enter a value before saving the document
Use SQL Statement - advanced option and will require assistance from support. This option works with a lookup edit control allowing Microix to show data from another SQL database within the same SQL instance
Lookup Value - if working with a Control Type=Lookup, you can build a list of lookup values by using the plus icon at the bottom of the grid
Finally, you map your user defined field to the Microix Document Type as shown below:
Results:
User Defined Field shown on the PO Entry Form:
User Defined Field shown on the My Document List when "Display in Grid" is checked:
Additionally, if showing the value of the user defiled on the printed document is required, you can use the forms designer and add the field based on the Field ID assigned in Section 2.
DataImage25.png
DataImage40.png
DataImage86.png
DataImage47.png
DataImage83.png
DataImage27.png
DataImage95.png