
How to setup a scheduled task to poll data from Microix Time Clocks using the ADMS/Cloud feature
IMPORTANT: If your Microix SQL database name was changed from the default "MWFMData" please notify support as we need to update our system. Polling will not work unless the database names in both systems are the same.
IMPORTANT: if you are migrating from a local copy of time clock manger to our Microix Cloud Time Clock Manger, it is important to poll the clock one last time before uninstalling the time clock manger software. All copied of this application should be removed from the PC and or Server and their scheduled task should be deleted. The scheduled task is normally called "Microix Time Clock Polling"
RE: For customers who are managing their Microix Time Clocks using the ADMS/Cloud feature and are NOT hosting the Microix/MIP software with Abila Cloud Service. For some deployments, we offer a push feature which allows our MicroixCloud.com/tcm/ site to push the time clock data to a public facing IIS Server. For this type of deployment, it is not necessary to schedule a polling task but it is necessary to install Microix Web API service on the public facing IIS server.
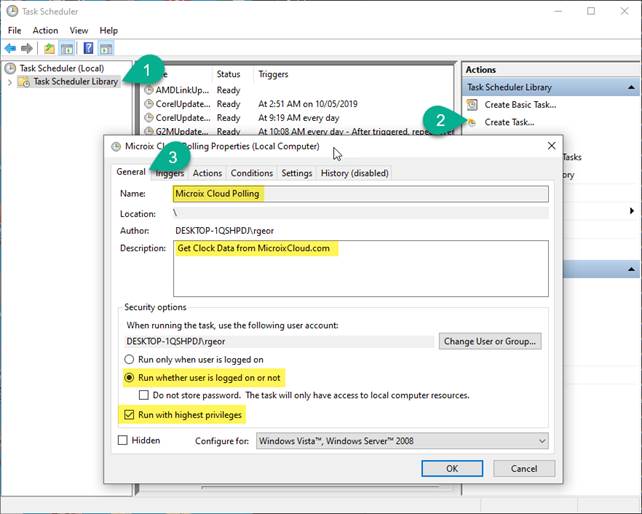
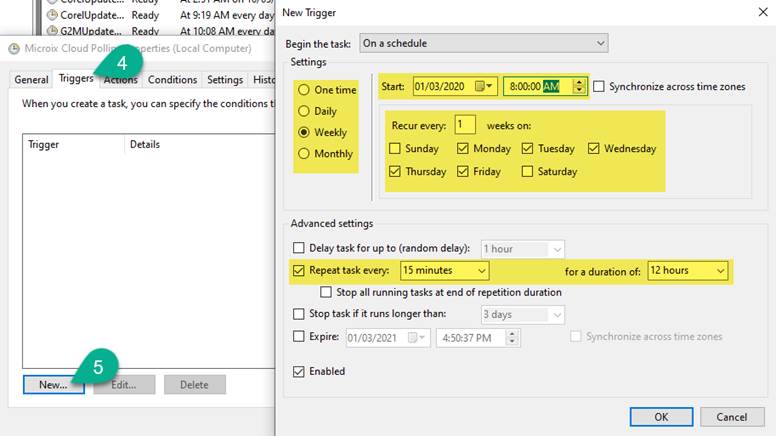
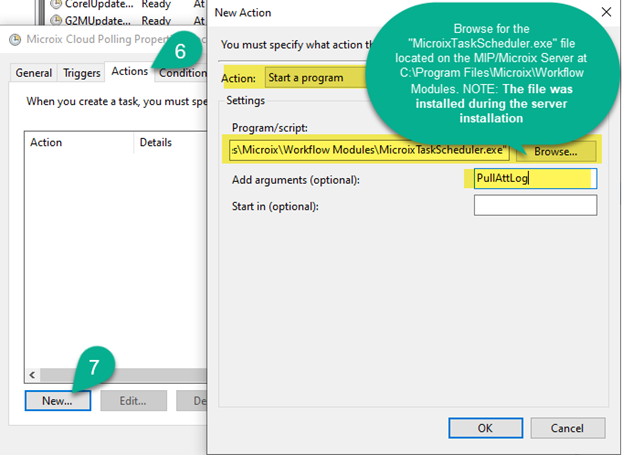
To begin the process, verify the version of workflow modules is 2019.1,1 or higher. Open the Windows Task Scheduler from the MIP/Microix Server and follow the steps to create a scheduled task to retrieve the time clock data from the MicroixCloud.com/tcm/ Time Clock Manager Server.
How to determine if the schedule task are retrieving the attendance records from the Microixcloud.com/tcm/ server?
Option 1: Verify the attendance data are reported in Microix Workflow modules by reviewing the Time Cock Entries report
Option 2: Verify the attlog.txt which is located in the same folder as the scheduled task fill
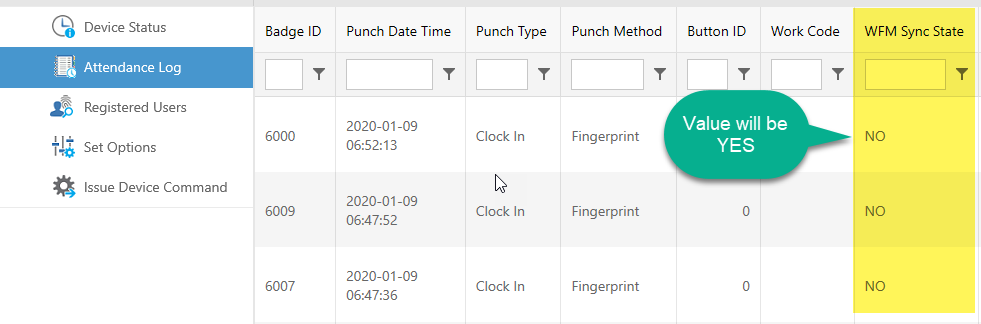
Option 3: Navigate to https://Microixcloud.com/tcm website and verify the attendance record has "YES" for under the column WFM Sync State.
Option 2: Verify the attlog.txt which is located in the same folder as the scheduled task fill
Option 3: Navigate to https://Microixcloud.com/tcm website and verify the attendance record has "YES" for under the column WFM Sync State.
Troubleshooting tips:
If the sync is not working, verify the SQL server name is valid:
- Version 2021 or higher, check Local Registry Path "Computer\HKEY_LOCAL_MACHINE\SOFTWARE\Microix\Workflow Modules Client\Connection" for the correct SQL Server Name
- Versions Prior to 2021, check the connection.ini located at C:\Program Files\Microix\Workflow Modules Client" for the correct SQL Server Name
- Verify Read/Change permission on the "C:\Program Files\Microix\Workflow Modules Client" folder
- Contact Microix Professional Services to verify the cloud PUSH/PULL trigger is active. Additionally, verify the Company ID, NPSNumer and Microix Database Name are all correct
image005.jpg
image006.jpg
image007.png
DataImage2.png
| Files | ||
|---|---|---|
|
|
image005.jpg
43 KB
|
|
|
|
image006.jpg
41 KB
|
|
|
|
image007.png
117 KB
|
|
|
|
DataImage2.png
35 KB
|