How Do I Create Custom Label Sizes and Formats For My Item Labels?
How do I create a custom label sizes and formats on which to print Item Labels?
Microix allows formatting of item labels to meet custom label requirements. Utilizing forms designer, you will create a new format using a wizard for guidance. Then, you will need to add each field and its associated data to the label. Finally you will save and utilize this label at item label print time.
Note: The default three-column layout allows for inventory ID's up to 7 characters. For inventory ID's up to 13 characters, utilize this article to create a custom two-column layout. For ID's over 13 characters, you would create a custom one-column layout.
Note: When designing Item ID's, avoid using special characters. Stick to alpha-numeric only.
Getting Started
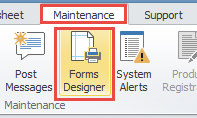
Navigate to Maintenance > Forms Designer
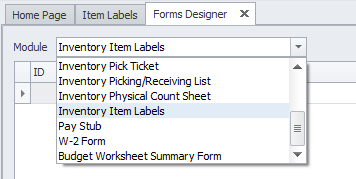
Choose the “Inventory Item Labels” module
Click on “Add” and give the new label format a description

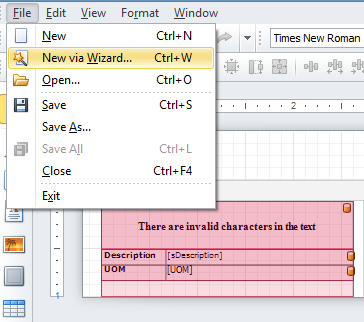
Inside Forms Designer, we select File > New via Wizard
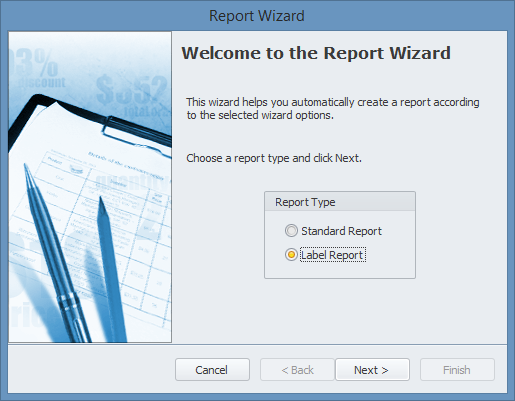
Select “Label Report” and Next.
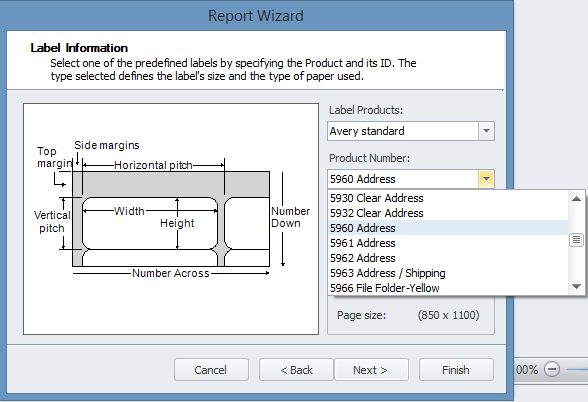
Choose the label vendor in the first box and the label number in the second, then choose next
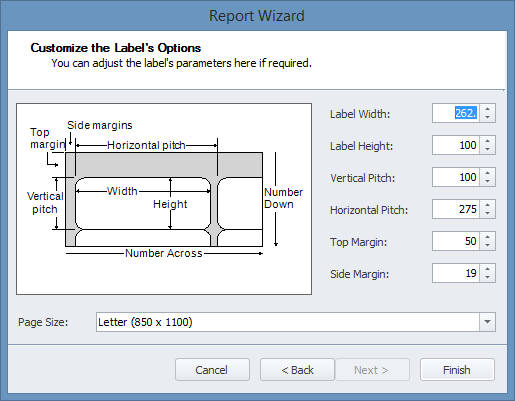
If any adjustments need be made, you can customize the label measurements here
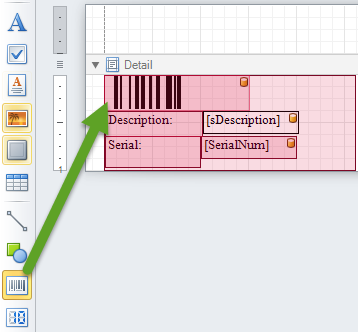
Using the toolbar, select what type of field you would like to add to the new layout. Let’s start by adding the barcode itself. Choose barcode and draw it on the format field.
In your report explorer on the right, select the Field List tab.
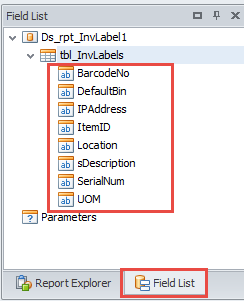
Now drag the related fields and drop them over the item fields we created in the previous step. (ie: Drag SerialNum next to the Serial field and for BarcodeNo just drag directly onto the barcode.)

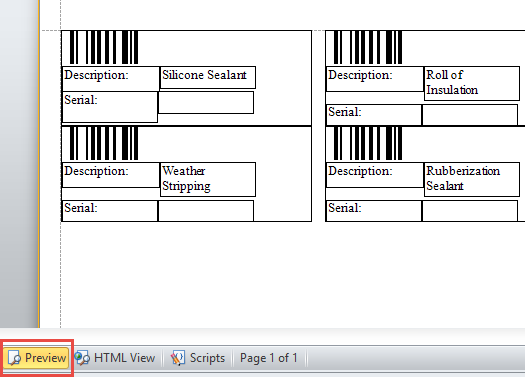
Choose “Preview” to see a live version of your template.
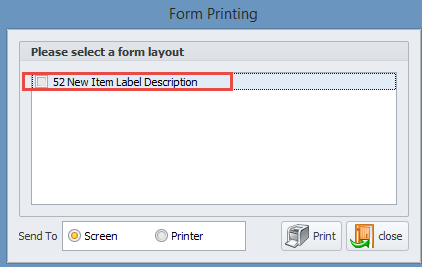
Choose Save to complete the design of your label template. You will be prompted for the label template during print time of item labels.
Microix allows formatting of item labels to meet custom label requirements. Utilizing forms designer, you will create a new format using a wizard for guidance. Then, you will need to add each field and its associated data to the label. Finally you will save and utilize this label at item label print time.
Note: The default three-column layout allows for inventory ID's up to 7 characters. For inventory ID's up to 13 characters, utilize this article to create a custom two-column layout. For ID's over 13 characters, you would create a custom one-column layout.
Note: When designing Item ID's, avoid using special characters. Stick to alpha-numeric only.
Getting Started
Navigate to Maintenance > Forms Designer
Choose the “Inventory Item Labels” module
Click on “Add” and give the new label format a description
Inside Forms Designer, we select File > New via Wizard
Select “Label Report” and Next.
Choose the label vendor in the first box and the label number in the second, then choose next
If any adjustments need be made, you can customize the label measurements here
Using the toolbar, select what type of field you would like to add to the new layout. Let’s start by adding the barcode itself. Choose barcode and draw it on the format field.
In your report explorer on the right, select the Field List tab.
Now drag the related fields and drop them over the item fields we created in the previous step. (ie: Drag SerialNum next to the Serial field and for BarcodeNo just drag directly onto the barcode.)
Choose “Preview” to see a live version of your template.
Choose Save to complete the design of your label template. You will be prompted for the label template during print time of item labels.
image001.png
image002.png
image003.png
image004.png
image005.png
image006.png
image007.png
image008.png
image009.png
image010.png
image013.png
image014.png