How to add a new approval level to existing workflows
Creation date: 10/25/2016 2:05 PM
Updated: 10/27/2016 10:51 AM
IMPORTANT: Please make a backup of your Microix database before performing the steps below. Backup your database by navigating to Support Tab>Backup form the ribbon menu of Workflow Modules Client application. You should also consult with your Microix Business Partner or Microix Support.
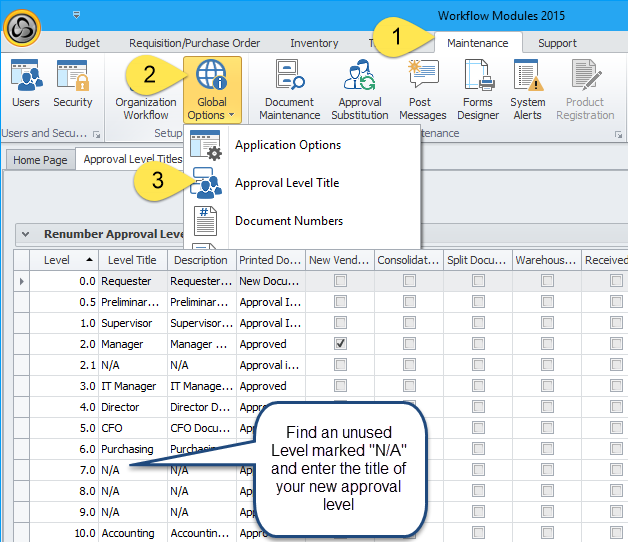
1. Create/Activate a new approval level
2. Insert the new approval level to each workflow. A manual adjustment may be necessary to each workflow to modify routing of exiting levels to the new approval level or use the “Update existing level” option in the routing wizard to update existing level if applicable.
1.png
2.png