How to setup Work Codes on an iClock700 Timeclock
Creation date: 11/3/2016 6:05 PM
Updated: 11/3/2016 6:06 PM
If you would like to collect employee’s time to a specific cost center then work codes maybe a solution for you. It allow employees to specify a work code before clocking IN/OUT and have Microix associate those set of hours to a specific charge/distribution code which later are used on a timesheet to allocate salaries to a cost center.
1. To start the process, login to Workflow Module Client application and navigate to Timesheet>Options>WorkCode tab. Enter all work coders to later upload to all clocks and used by employees during the clock IN process. Keep the work codes between 1-4 characters for easy data entry. NOTE: You will not be able to associate the work codes to specific employees, all users of the clock will see the entire list of work codes.

2. After creating all work codes and associating them with a charge code, open the Microix Time Clock Manager software to upload all work codes to the time clock.
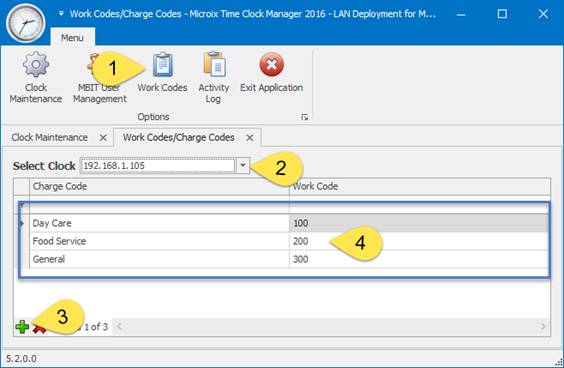
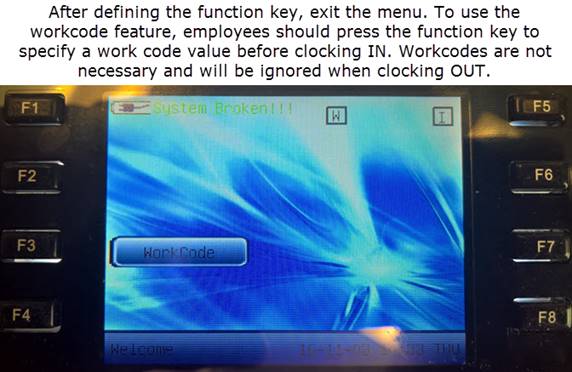
3. Finally, activate the Work Code feature of the clock by following the steps below. If your clock is configured to not press IN or OUT (verify mode) then users should only use Work Codes as needed and only on IN type punch. They do not have to specify a work code on an OUT punch. If employees do not enter a work code, the system will use their default charge code that is setup in Workflow Modules.

NOTE: When replying to this email please leave the subject-line intact.
1. To start the process, login to Workflow Module Client application and navigate to Timesheet>Options>WorkCode tab. Enter all work coders to later upload to all clocks and used by employees during the clock IN process. Keep the work codes between 1-4 characters for easy data entry. NOTE: You will not be able to associate the work codes to specific employees, all users of the clock will see the entire list of work codes.
2. After creating all work codes and associating them with a charge code, open the Microix Time Clock Manager software to upload all work codes to the time clock.
3. Finally, activate the Work Code feature of the clock by following the steps below. If your clock is configured to not press IN or OUT (verify mode) then users should only use Work Codes as needed and only on IN type punch. They do not have to specify a work code on an OUT punch. If employees do not enter a work code, the system will use their default charge code that is setup in Workflow Modules.
NOTE: When replying to this email please leave the subject-line intact.
ATT00001.jpg
ATT00002.jpg
image002.png
image001.jpg