How to Create a New Workflow
At a minimum, each workflow must include:
Optionally, workflows can include advanced features such as:Requesters– users who initiate documents
Approvers– users who review and approve documents
This article provides step-by-step instructions for creating a new workflow using the Workflow Wizard.Account Restrictions
Distribution Codes
Item Categories
Budget Enforcement
🧭 Step-by-Step Instructions
1. 🚪 Login to Workflow Module Modern
-
Go to: Maintenance > Organization Workflow
-
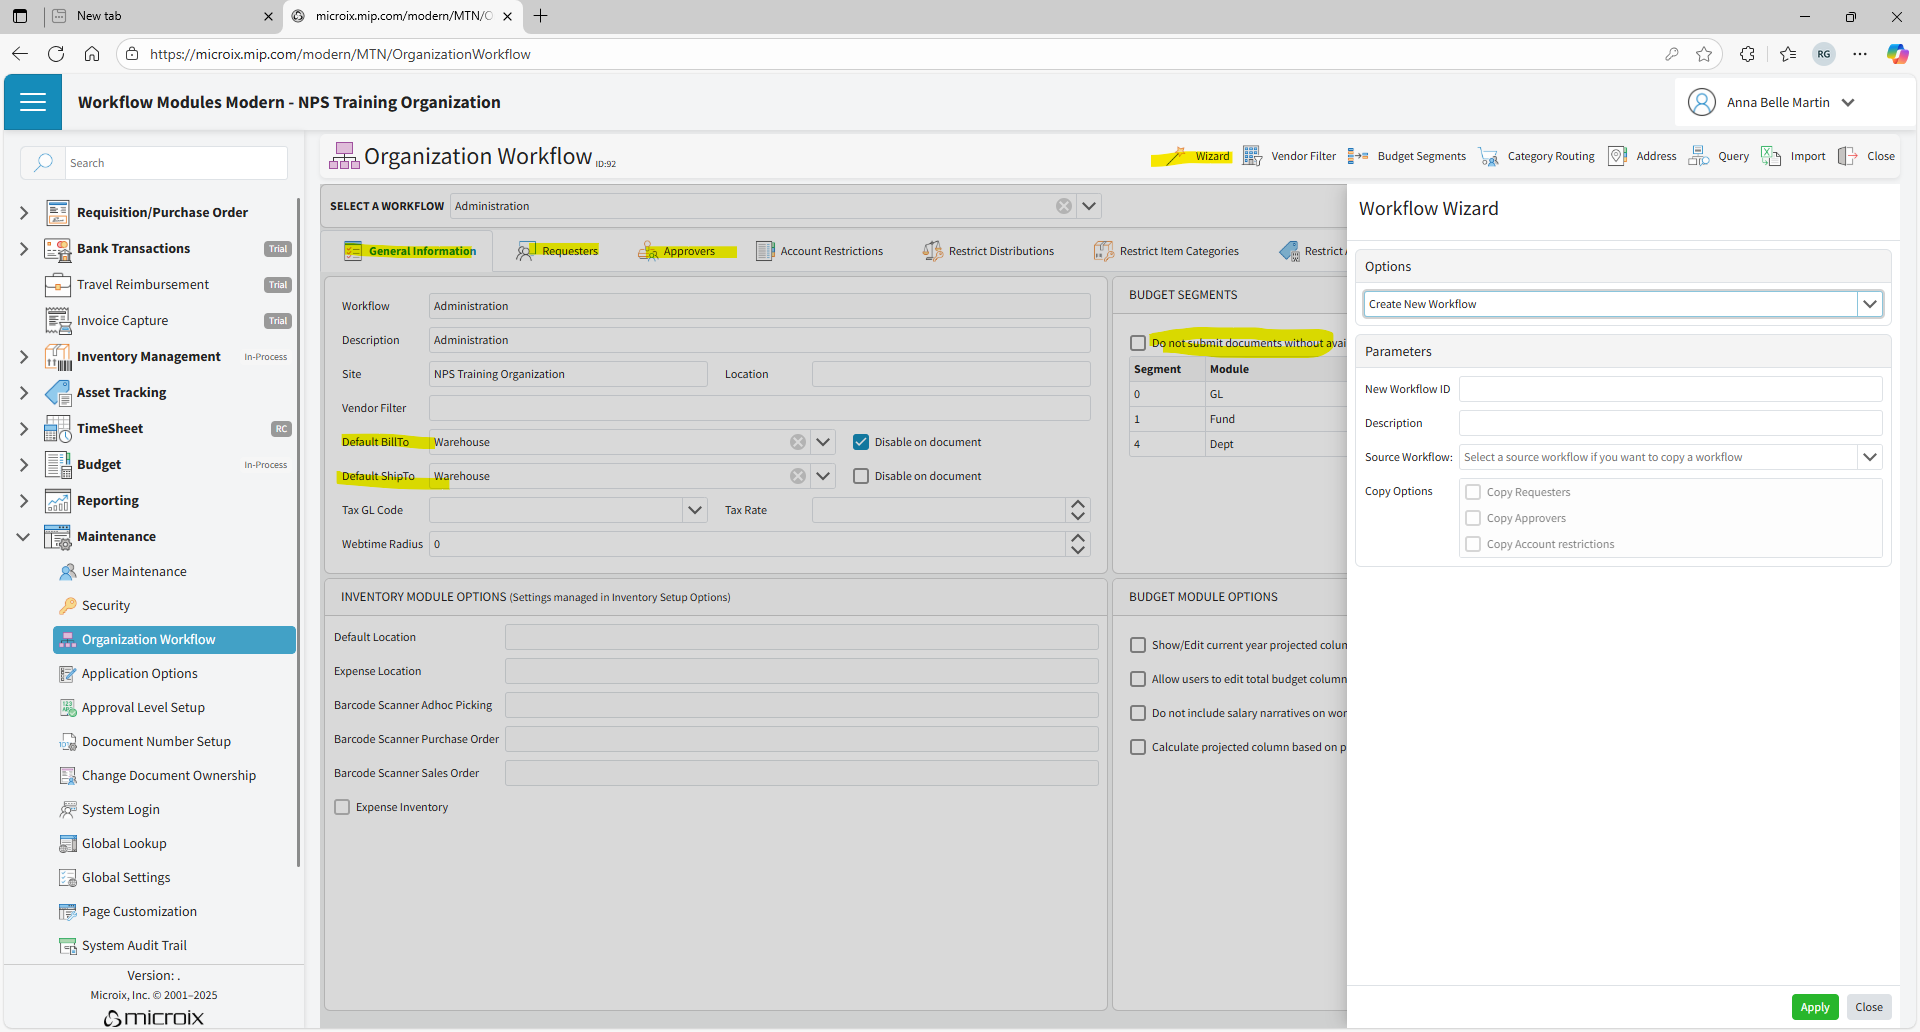
Click the Wizard icon to launch the workflow wizard
2. 🆕 Create a New Workflow
-
In the Wizard, choose "Create a New Workflow"
-
Enter a unique Workflow ID and a Description (e.g., “101-Finance, 102-Programs”)
-
Click the Apply icon (bottom right corner). Optionally, you may copy requesters and approvers from other workflows as required.
3. ⚙️ Configure General Information
-
From the Workflow Selection dropdown, select the workflow you just created
-
In the General tab, check the option "Do not submit document without available funds" if you want to prevent users from submitting documents that do not meet the budget requirements.
Note: If you only need a warning message (and do not want to prevent submission), leave this option unchecked and instead enable the "Budget Warning" option found under Maintenance > Application Options. -
Set Default Bill To and/or Default Ship To addresses (If no address codes are available, Click the Address icon(upper right) to add an address)
4. 👤 Assign Requesters
-
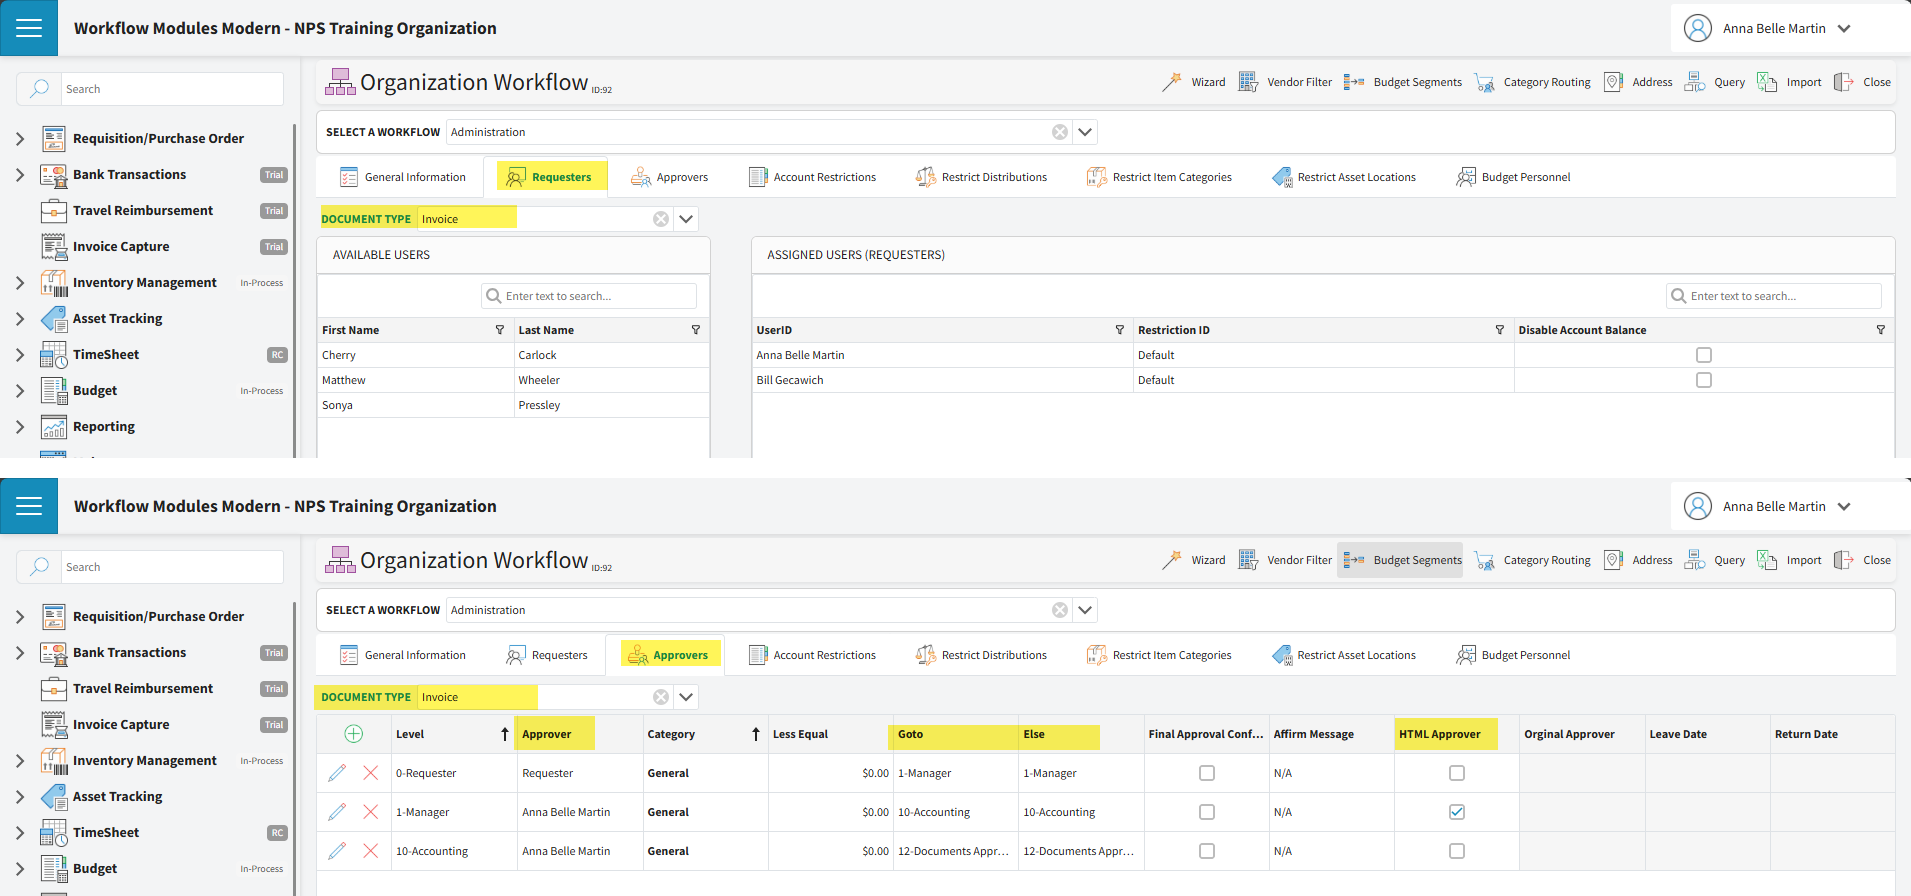
Click the Requesters tab
-
Select the applicable Document Type (purchase order, invoice, timesheet...)
-
Choose users from the Available Users list (left) and move them to the right to assign
5. ✅ Set Up Approvers
-
Click the Approvers tab
-
Select the applicable Document Type
-
Click the green “+” icon to add a new approval level
📌 Note: The system will prompt you to insert all active approval levels.
-
Selecting Yes will auto-populate existing levels
-
Selecting No allows you to build levels manually
Click the Approvers tab
Select the applicable Document Type
Click the green “+” icon to add a new approval level
📌 Note: The system will prompt you to insert all active approval levels.
-
Selecting Yes will auto-populate existing levels
-
Selecting No allows you to build levels manually
For each approval level added:
-
Level 0 is reserved for the Requester (no approver required)
-
For all other levels:
-
Assign an Approver
-
Set the Go to and Else values to determine workflow routing
-
6. 💾 Save and Close
-
Changes made in the General tab will prompt you to confirm when closing via the Close button
-
Changes made in all other tabs are automatically saved
Changes made in the General tab will prompt you to confirm when closing via the Close button
Changes made in all other tabs are automatically saved
💡 Tips for Workflow Management
-
Use clear and descriptive names for workflows to make them easy to identify and maintain
-
Ensure each approval level has an assigned user to prevent routing errors or delays
Enable the "HTML Approver" option to allow requests to be approved directly from an email notification. This feature is not available for Level 0 or for any approval level where "Go To" is set to Level 12. (The HTML Approver is an add-on feature.)
-
Leverage the Workflow Wizard’s “Copy” feature to duplicate an existing workflow—then update only the necessary details for the new one. This can significantly save time
-
When adding new users to a workflow, don’t forget to assign the appropriate security permissions via: Maintenance > User Security
Use clear and descriptive names for workflows to make them easy to identify and maintain
Ensure each approval level has an assigned user to prevent routing errors or delays
Enable the "HTML Approver" option to allow requests to be approved directly from an email notification. This feature is not available for Level 0 or for any approval level where "Go To" is set to Level 12. (The HTML Approver is an add-on feature.)
Leverage the Workflow Wizard’s “Copy” feature to duplicate an existing workflow—then update only the necessary details for the new one. This can significantly save time
When adding new users to a workflow, don’t forget to assign the appropriate security permissions via: Maintenance > User Security